Sunday, July 31, 2011

Mayan Fish (fish marinated in an achiote & orange sauce)

There are some events in your life that, even though took place many years ago, you remember them with vivid clarity. Eating Mayan Fish, is one of those memories. When I was about ten, my parents took my brother and I to Islas Mujeres (an idyllic tiny island in the Riviera Maya). After spending some time in the beach – and of course doing touristy things like taking pictures with a shark – we ate at a restaurant at the beach. No, it was not a restaurant with air conditioning and booths. The restaurant was located under a big “palapa” (an open-sided dwelling with a thatched made of dried palm leaves) and the kitchen was a huge coal grill. On the grill were fish fillets marinated in an achiote sauce (a paste favored in Yucatán and Oaxacan cuisine, that is made from the slightly bitter, earthy flavored, red annatto seeds, mixed with other spices and ground into a paste). Anyhow, I don’t remember if I ordered this dish or if my parents ordered it for me but I remember seeing a big fillet of fish on my plate and tortillas on the side. I put lime juice on it (because I love lime juice and because its pairs perfectly with fish!) and ate a bite. The fish was delicious. The earthy flavor of the achiote sauce complemented the fish’s natural “fishy” flavor. My parents added habanero salsa to the fish, which if you enjoy spicy food, it’s a great addition. Actually, my dad put so much habanero on his fish (thinking that it was other less spicy type of hot pepper) that he was not able eat the rest of the dish. Needless to say, he was quite upset.

Until this day, my family and I still talk about the wonderful fish we had in Islas Mujeres. Since then, I’ve tried to make it at home. I make my own sauce and add orange juice. This is a healthy recipe that is ridiculously easy to make and delicious. You may not have achiote in your pantry but it is a good investment if you like Mexican food because many of its staple dishes (i.e. cochinita pibil) use this spice. Below is my version of Mayan Fish. Enjoy


Mayan Fish
Serves 3 people

Ingredients:
3 White fish fillets (such as tilapia or catfish)
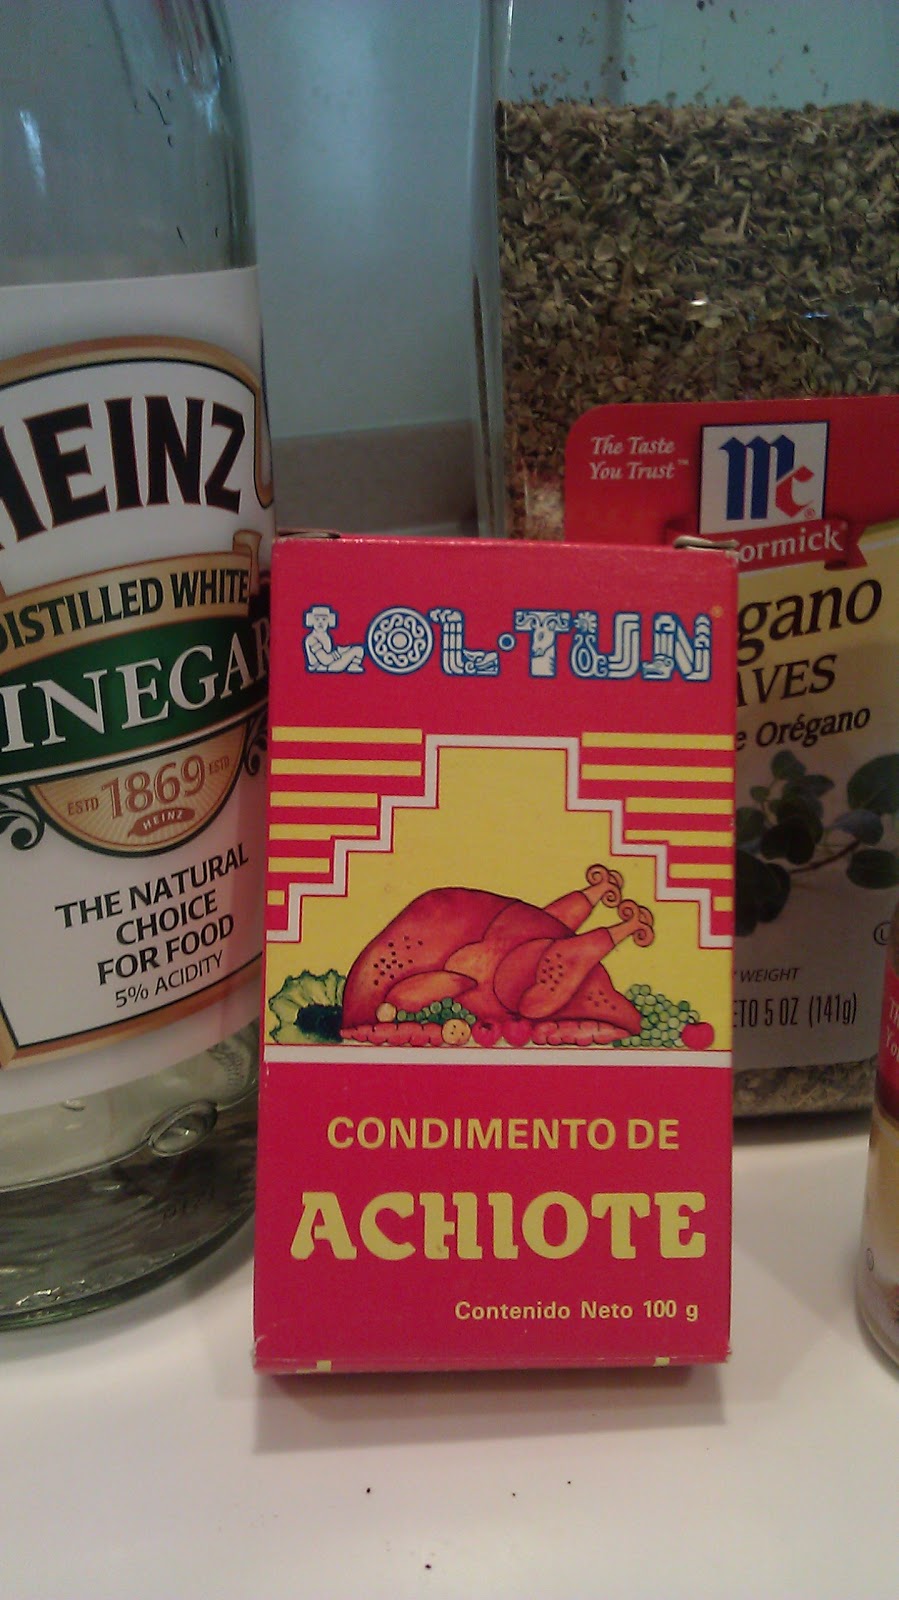
2 tbs. achiote
½ tbs. oregano
1 tsp. cumin
1 large orange (juice)
2 tbs. white vinegar
Salt & pepper

Directions:
In a bowl, mix the achiote, oregano, cumin, orange juice, vinegar, salt and pepper. Marinate the fish fillets in this sauce for approximately 4 hours. Cook the fish in the grill on an oiled fajita pan (one fillet per pan) for about ten – 12 minutes. If you don’t have a fajita pan, you can cook the dish on a normal pan on the stove. Once cooked, serve with slices of lime and pickled onions on top.

Note. I serve the fish with rice on the side and habanero sauce.

Saturday, July 23, 2011

Orange Margarita

I don’t know where you live, but where I live it has been smoldering hot. It’s been so hot that going outside feels like entering a sauna room. It’s been so hot that, walking outside for five minutes leaves you feeling sort of “melted.” I keep thinking how much I would like to be at the beach at this very right moment and jump in the refreshing ocean. I know I am not going to any beach any time soon, so I guess I am a masochist for having those recurring thoughts. Anyhow, I don’t have the power to make the heat go away but I do have a recipe for an orange margarita that will transport you to a Caribbean beach as soon as you have your first sip.

I am not a big fan of Margaritas, not because of the tequila, but because most restaurants don’t make their margaritas from scratch. Instead they use a pre-made mix that tastes too artificial for my liking. In my lifetime, I have had two really good margaritas: a mango moonshine margarita in West Virginia (don’t ask) and a blood-orange margarita at Perro Salado ( http://perrosalado.com ) in Newport, RI.


My inspiration

I won’t tell you about the Mango Moonshine Margarita because I cannot recall the details of that night but, I’ll tell you all about the Blood Orange Margarita. Recently, my husband and I took a walking tour of restaurants in Newport, RI. After walking under the summer sun for approximately one hour and a half, we were anxious to visit our last stop: a restaurant called Perro Salado. We entered the restaurant’s patio, which was located under the shadow of two beautiful trees, and were happily surprised when the tour guide told us that the chef had prepared for us a glass of blood-orange margarita and guacamole with tostones. I was glad to hear that the chef made – from scratch – the orange puree used in the drink. A sip of the margarita was all I needed to know that I had to have another one. The sweet and tangy flavor of the orange juice was obvious, but it did not overpower the distinct flavor of the tequila. The drink was so very refreshing that it made you forget you were drinking tequila before 5:00 p.m.

As soon as we got home from our vacation, I tried to make this drink. I could not find blood-oranges so I used Florida oranges. I squeezed the juice from the oranges, added triple-sec, tequila and a few drops of lime. I served it on a glass with ice and it was (insert Larry David’s voice) pretty, pretty good!

So I propose to you that in this hot weather, make yourself this margarita. As soon as you have your first sip, it will transport you to a Caribbean island. Cheers!


My  version
Orange Margarita
Servings: 1

Ingredients:
2 oz. orange juice
1 oz. tequila
0.5 oz. triple sec
Lime juice

Directions: Mix all the ingredients and serve on a glass with ice.

Sunday, July 17, 2011

Eating in Rhode Island

Two weeks ago we spent a lovely week in Rhode Island. We stayed in Charlestown, a picturesque beach town in southern Rhode Island, but we also spent some time in Westerly, Newport and Misquamicut. Although we spent most of our time at the beach, we also made time to discover new restaurants – and we were successful.


In Charlestown, we discovered a new small restaurant called the Breachway Grill. The restaurant is conveniently located on the way to beach and it offers a good variety of dining items – from fresh oysters and steamers, to quality brick oven pizzas, to ribs. If you love fresh seafood as much as I do, this is a great place to go in Charlestown. We tried blue point, malpeque, and umami oysters. We also had little necks and steamers. After a long day at the beach, the fresh seafood and a pint of beer hit the spot. We also tried one of their brick oven pizzas: the margherita pizza. It was crispy, toasty and the quality of cheese was evident. Did we like it? Let me just tell you that during our week in Rhode Island, we ate at this restaurant three times.

If you visit Rhode Island, do yourself a favor and visit Newport. Not only is it a beautiful town with many attractions like the mansions, but it has many wonderful restaurants. Since Nate and I are beer lovers, we visited Coastal Extreme Brewing Company where we tried several of their beers: Newport Storm Amber Ale, Newport Storm Summer Ale, Rhode Island Blueberry Ale, and a fourth beer that I cannot remember (memory loss is a side effect of beer sampling). My favorite was their blueberry beer – made with blueberries from a local farm – which had a crisp fruity flavor but not overly sweet. The brewery started making rum as well and we could not pass the opportunity to try it. Thomas Tew Rum, named after Newport’s most famous pirate, was smooth and sweet. I think Tew would have approved.

After an hour of beer sampling (no, we did not drink a case of beer, we just spent a lot of time talking to one of the company’s owners who enjoyed discussing the art of making beer) we decided to grab a bite to eat at our favorite pizza joint in Newport: Firehouse Pizza. Firehouse Pizza is one of the funkiest places I have ever visited. Housed in an old firehouse, the walls are “decorated” by endless graffiti that does not seem to have a cohesive theme; there are all sort of old dolls and stuffed animals on shelves and little clowns hanging from the ceiling. Every time we go we see at least one couple peaking in and immediately turning around. Big mistake. The Firehouse has the best pizza in Newport, and it’s BYOB. We always get the Firehouse special which has pepperoni, green peppers, onion, olives, and chorizo. Yes, chorizo. One slice of this deep-dish pizza and you’ll forever be grateful that you gave this funky place a chance. I would love to tell you more about the other items on the menu, but I’ve never had them. All I want to eat when I go there is their pizza.

We also took a “food tour” with Newport Gourmet Tours: the Broadway tour, where we visited several of the best restaurants in town. Our first stop was the White Horse Tavern, the oldest tavern in America. Housed in a beautiful old house, the building which is said to be haunted, houses one of the best restaurants in the island. The chef made for us a delicious tuna tartare taco with a creamy chipotle sauce. The taco was delicious – the tuna tasted very fresh and the spicy sauce complemented it beautifully. I was impressed by the fact that they made their own corn tortillas at the restaurant – and you could taste it.

During the tour we stopped at Donicks – an ice cream store where the owners concoct the strangest ice cream combinations. During our visit, we sampled candied bacon ice cream and banana ice cream. At this moment you may be wondering, how does bacon ice cream taste? Surprisingly good! The bacon bits in the ice cream are crispy, toasty, sweet and salty, which combines neatly with the sweetness of the ice cream base. We actually bought a quart of it!

We also visited a great restaurant called the Fifth Element where we had pan-roasted Cod with chickpeas, green olives, shaved fennel, radish and salsa verde. The dish was delicious and I wished I had eaten more of it. The best part of visiting this restaurant was the opportunity to talk to the chef who shared the secret of making delicious food: fresh seasonal ingredients. So basic, but so true.
Our last stop was my favorite: Perro Salado restaurant. After an hour and a half of walking around Newport, our last stop surprised us with a delicious blood-orange margarita and fresh guacamole with tostones on the side. Now, I am not a big fan of margaritas because restaurants rarely use fresh ingredients. Perro Salado does. Its chef used freshly squeezed blood-orange juice and quality tequila to make its margarita. The result was the best margarita I have ever had. The chef at perro salado also gave us freshly made guacamole and instead of chips, he used tostones –a flattened and fried plantain. I never had tostones with guacamole but I really liked it.

If you are ever planning a trip to New England, try to get to the smallest state in the country. Within its small borders, it has lots to do and, as you can see, tons of great restaurants. Oh yeah, beautiful beaches too.

Sunday, July 10, 2011

Shore Dinner – How to Cook and Eat Lobster


When my wife asked me to write a guest entry for her blog, I couldn’t figure out why. I thought she was kidding. Then she explained the dish she wanted me to write about and I understood: lobster. It is probably the only thing in the world that I have more experience cooking or preparing.

For years, my family and I in Rhode Island have eaten a traditional “shore dinner” on the 4th of July. There is really no official definition of a shore dinner, but it should have two key components: lobster and corn on the cob. During summer, nothing tastes better than a freshly cooked lobster and fresh corn on the cob. Neither need much more than butter to let the true flavors of nature shine.

Anyway, back to the task at hand: preparing a lobster. In Rhode Island, and much of New England for that matter, there are plenty of small mom-and-pop places selling lobsters and all kinds of seafood. They are very fresh and most are family owned. This year, we bought ours from a place in Charlestown called Happy Acres that sells lobster, clams, fresh vegetables, and homemade pies. It was a good choice.

There are two traditional ways to cook a lobster. Some say you can grill a lobster, but I can’t imagine how you cook through consistently enough to grill a good lobster. And believe me, there’s nothing worse than either an undercooked or an overcooked lobster. The traditional, tried-and-true methods are boiling or steaming. Steaming cuts down on the water that inevitably fills the shells during the boiling process and, depending on how many lobsters you are cooking, requires less water to bring to a boil since all your lobsters must be completely submerged if boiling.


I filled a large steaming basin about an inch or so below where the bottom of the steaming basket would sit. Then I added about three tablespoons of salt. If you are right on the water, salt water right from the sea, bay, or salt pond works best. After bringing to a boil, set the steaming basket on top of the basin and cover to let some steam build up for a few minutes. Then, in they go!


If you search the internet, you will find tons of different timing suggestions for lobsters depending on size and total number. None are consistent, and frankly, like anything in cooking, the timing is all dependent on temperature and characteristics of what you are cooking. So the best thing to do is just keep an eye on the lobsters. After about eight or ten minutes, check them and look at their color. You will also start smelling the lobster as it cooks. When all parts of the shells are a bright red (see photo), you will want to remove them from the heat and serve. Give them a few more minutes before eating to allow the water that will be left inside to cool down. 


Then it’s time to eat! There is no right way to eat a lobster. Everyone seems to have their own little tricks to get the meat out of the shells; however, you will need a pair of crackers. Also, the entire lobster is edible and some parts are, in fact, considered delicacies to some. I love lobster, but I have never been able to bring myself to eat anything other than the meat. My grandfather however, until shortly before he died at the ripe age of 89, would gladly take everyone’s shells and dig out the liver, called tomalley, and eggs, called roe or “coral”, that are found in some females. This was always a great show.


Dip your lobster in melted butter and enjoy. With a great piece corn, you’ve got yourself a true shore dinner. Happy 4th of July or whatever occasion you’ve chosen.

Sunday, June 26, 2011

Rhubarb & Strawberry Pie

Freshly picked strawberries are good. Freshly picked rhubarb is also good. But you know what is better? Combining both and making rhubarb & strawberry pie!

Last week I happened to have rhubarb from my garden and Jen happened to have picked strawberries from a local farm. So we put one and one together and decided to head to the kitchen and make this pie. We got in the kitchen, put some music on, took all the ingredients out of the pantry, and 10 minutes later the pies were ready to be put in the oven. Yes, it was that easy. Basically, all you have to do is chop the rhubarb and strawberries, and mix the rest of the ingredients. That’s it. Forty-five minutes later, you’ll have a good looking pie coming out of the oven bubbling with aromatic juices. But, I’ll be honest with you, when you cut into the pie, it won’t look pretty. It’s sticky, messy and gooey - but God it’s good. In fact, after my husband had a bite of it, he urgently asked me if I had a copy of the recipe because he wanted to make another pie the following week. Yes, it’s that good.

This recipe comes from Jen’s Grandmother’s pantry. Jen graciously let me share it with all of you. And for that, we all should be grateful because once you make this pie, you’ll want to make it over and over again. If you volunteered to bring a pie to your next picnic, why don’t you make this pie? Take advantage of the fact that strawberries and rhubarb are in season.


Rhubarb & Strawberry Pie

Ingredients:
1 Graham cracker pie crust
4 cups fresh rhubarb diced (you can use frozen rhubarb as well)
3 cups fresh strawberries, sliced (you can use frozen strawberries as well)
1 ½ cups white sugar (you can use Splenda)
6 tbs. quick-cooking tapioca


 For the topping:
1 cup flour
1 cup white sugar (you can use Splenda)
1 tsp. salt
1/2 cup butter diced

Directions
1. Preheat oven to 400 F.
2. In a bowl, mix together the rhubarb, strawberries, sugar and tapioca. Spoon the mixture into the pie crust.
3. Combine the flour, sugar, salt and diced butter until the mixture is crumbly. Sprinkle this mixture over the filling.
4. Bake for 10 minutes at 400 F. Reduce the heat to 350 F and bake for 35 minutes. 


Monday, June 20, 2011

Sticky Buns with Pecans and Raisins

Since my last two posts have been healthy recipes, I think it is time to indulge and enjoy a decadent treat. If that is not a good enough reason for you to indulge, I’ll give you another one: it is Monday and we all need something that makes the beginning of the working week more bearable, no?

I decided to start my week baking sticky buns. Why? Because I wanted to bake something for our neighbors who took care of our cat this weekend while we were away and for my dad as part of his Father’s Day present… Okay, I’ll confess, the real reason why I just baked sticky buns in the middle of the summer is because this past weekend I had the best sticky buns I have ever had (courtesy of Liz’s mom) and since then, I have been craving them. And I knew that store-bought sticky buns would not do the trick.

Although I have several recipes for sticky buns, I chose this one because it has pecans and raisins in it. The pecans add a pleasant nutty flavor and crunchiness to the buns. It also calls for lime zest, which adds a light citrus hint to the dough that pairs very well with the syrup. Although the recipe looks long and intimidating, it is really easy to follow. All you have to do is plan ahead. I recommend you make the dough the day before. That way, all you have to do the following day is make the syrup and assemble the buns. The only problem is that while they are baking, your kitchen will be filled with the delicious aroma of the sticky buns and you will be waiting what seems like an eternity to eat them. But your wait will be well rewarded when you try this treat!

This recipe may not be very healthy. Sticky buns won’t strengthen your bones or lower your cholesterol, but they will definitely put a smile on your face… and that, my dear readers, is sometimes more valuable. Enjoy!


Sticky Buns with Raisins and Pecans
Adapted from Baking, Easy to Make Great Home Bakes by Carole Clements
Makes 15

Ingredients
Dough
2/3 cup of milk
1 package active dry yeast
2 tablespoons granulated sugar
3 ¼ cup of flour
½ cup (1 stick) salted butter (cut in pieces)
2 eggs, lightly beaten
grated rind of ½ lime

Topping and Filling
1 ¼ cups dark brown sugar, firmly packed
5 tablespoons butter
½ cup water
¾ cup pecans, chopped
3 tablespoons granulated sugar
2 teaspoons ground cinnamon
¾ cup raisins

You will also need:
  • Stand-mixer (if you don’t have one, you’ll have to mix the dough by hand)
  • 13 in. x 9 in. x 2 in. baking pan


    Directions
    1. Heat the milk for 30 seconds in the microwave (the milk should be lukewarm not hot). Add the yeast and sugar and leave until frothy, approximately 15 minutes.
    2. Add the flour and salt to your stand-mixer bowl. Using the flat beater attachment, add the butter and mix until the mixture resembles coarse crumbs.
    3. Take out the flat beater attachment and insert the hook attachment to your stand-mixer. Add the yeast, eggs and lemon rind to the mixing bowl. Turn on to “stir.” The dough will be ready when it no longer sticks to the mixing bowl (approximately 5 minutes).
    4. Once the dough is ready, leave to rise in a warm place until doubled in volume (about two hours).
    5. Combine the brown sugar, butter, and water in a heavy saucepan. Bring to a boil and boil gently until thick and syrupy (about 10 minutes). Make sure to stir constantly and keep an eye on it. Otherwise it will boil over and your stove will be a mess.
    6. Place the syrup in the bottom of the baking pan and sprinkle a thin layer of chopped pecans, reserving the rest for the filling.
    7. Punch down the dough and transfer to a floured surface. Roll out to an 18 x 12 in. rectangle.
    8. For the filling combine the granulated sugar, cinnamon, raising and reserved nuts. Sprinkle over the dough in an even layer.
    9. Roll up tightly, from the long side to form a cylinder.  Cut the cylinder into 1-inch rounds and place on baking pan. Leave to rise in a warm place until increased by half (about 30 minutes).
    10. Preheat the oven to 350 F. Bake until golden, about 25 minutes.
    11. Remove from the oven and invert the pan onto a sheet of wax paper. Leave for 3-5 minutes, then remove buns from baking pan. Transfer to a rack to cool. Serve sticky-side up.
    Tip: You can make the dough the day before to save time. After it has risen, put the dough in the refrigerator until you are ready to make the sticky buns. An added benefit is that cold dough is easier to handle.


    Tuesday, June 14, 2011

    Quinoa Salad

    I told you last week that I am in a salad kick, correct? Well, I have another salad recipe for you this week. I hope you don’t get the impression that I am they kind of woman who only eats salads. That cannot be further from the truth. Although I love salads, especially during the summer, I am known for my good appetite and love for nachos, pizza and beer. However, when I am not indulging, I do like to eat healthy. And I say “like” because I really do. To me, eating healthy is a way of life and not an obligation or a fad. My body craves vegetables and salads and my stomach gets “out of whack” when I eat too many procesed foods. But eating healthy does not equal eating boring foods. The best example is this quinoa salad. It is tasty, spicy, fresh, filling, and very, very healthy and low in calories.

    Quinoa is a seed (although sometimes it is considered a grain) that is native to South America, to be more specific, from Peru. I have read that Quinoa was once called "the gold of the Incas," because it increased the stamina of their warriors. Quinoa is considered a “super food” because it is high in protein, amino-acids and lysine (which is essential for tissue growth and repair). It is also a very good source of magnesium, iron, copper and phosphorus. Now you may be thinking, “since it’s so good for you, it must taste awfull.” Wrong! It has a light nutty flavor that absorbs other flavors easily. Thus, unlike kale (which is very good for you, but not very good tasting), you can eat quinoa without wincing and wanting to drink half a glass of water.

    Why don’t you give quinoa a try and make this salad? When I make it, I serve it as an appetizer with tortilla chips on the side and by the time dinner is ready to be served, it is gone!


    Quinoa Salad
    Servings – 8-10

    Ingredients
    7 oz Quinoa (cooked)
    12 oz frozen sweet corn (thawed)
    1 cup finely chopped cilantro
    1/4 cup green onions, thinly sliced
    2 plum tomatoes (diced)
    2 firm but ripe avocados (peeled, pitten, and diced)
    1/2 cup Lemon Vinaigrette
    1 jalapeno pepper dicned
    Salt and pepper to taste

    Directions
    1. Cook the quinoa in water until tender.
    2. In a mixing bowl add the cooked quinoa, corn, cilantro, onions, jalapeno, and tomatoes.
    3. Add dressing and mix.
    4. Add the avocados and mix. Add salt and pepper as needed.
    5. Serve cold with tortilla chips.